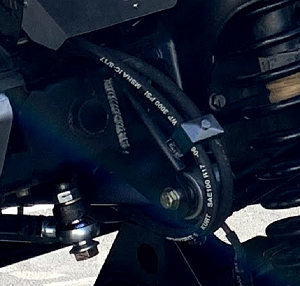
So you want to upgrade your Jeep JKU suspension to something that will handle all of the toughest trails America has to offer? In this article we will start a suspension that will do exactly that. When finalized this will be a JKU that has excellent on road manners as well as off road capabilities. A Jeep that can take you overlanding for thousands of miles without worry or hit the hardest trails in Johnson Valley California and be driven home after the trail runs are complete.
What is different about this build from other full
GenRight Off Road Elite Suspension builds? We will do this one in 3 stages. The owner of this Jeep wanted to install the complete Elite Suspension but did not have the funds to do the complete install. When the stock Rubicon axles gave up we designed a plan to build it in 3 stages. Most of us have suffered a "forced upgrade". This happens when your wheeling trails become tougher that the Jeep you are driving. Tough trails require tough, tested gear and GenRight knows how to design, fabricate, install and test their products. The Elite Suspension system is a work of art. Perfect fit of all components, professional welds and a superb design are just a few of the attributes that make it the right choice for this build.
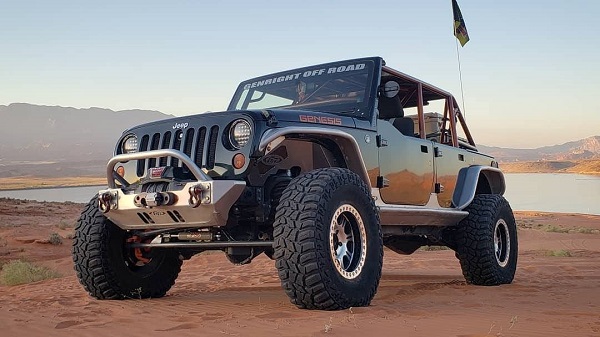
2012 Jeep JKU with 37" tires and upgraded Rubicon axles
The Jeep came to us with a 3" Currie short arm lift, Fox shocks, stock rear sway bar and stock Jeep Rubicon axles sitting on 37" tires with wheel spacers. The motor, trans and t-case are totally stock. The front axle inner C's were both bent making it difficult to drive on the road. A lot of money had been previously spent on upgrading the axle, but the customer's desire to wheel harder trails overcame the axle's ability to withstand the abuse. We decided it no longer made sense to pour more money into something that was just going to break again down the trail.
We decided the first stage should be installing
Currie Extreme 60 axles front and rear. We needed to design a way to do this, while keeping in mind the ultimate goal of a complete Elite Suspension system. We wanted to design the project so very little labor and materials would be discarded and waisted later.
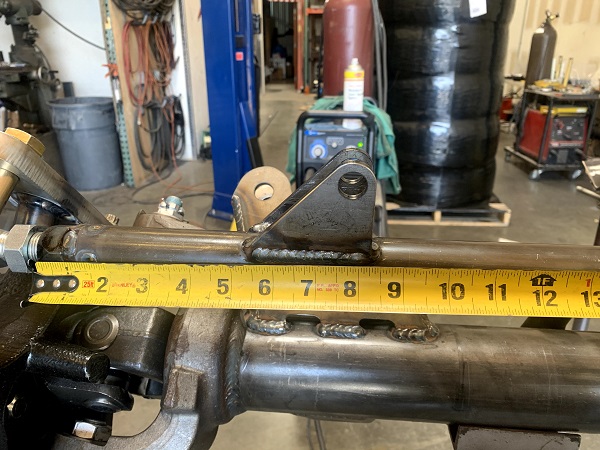
We ordered the rear axle from Currie Enterprises. Their Extreme 60's are specifically built for rock sports and racing. They are 70" wide (wheel mounting surface to wheel mounting surface) which is required for the Elite. The rear was ordered with the JKU bolt in brackets because we did not want to upgrade the fuel tank at this time, which is required to complete the Elite triangulated 4 link. We ordered it with 5:38 Gears, an Eaton electric locker, 5 on 5.5 lug pattern, 1350 driveline yoke and JK brakes.
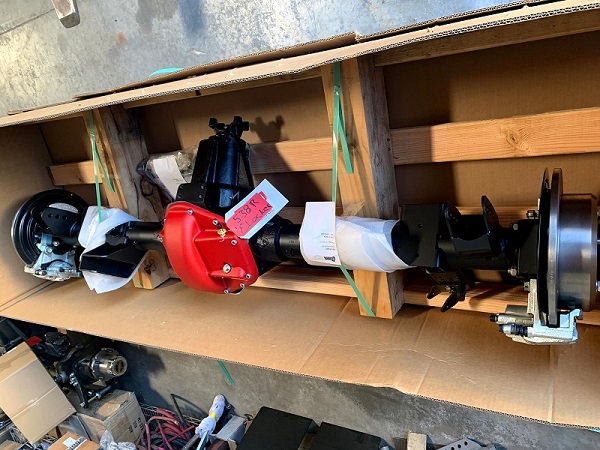
Currie Enterprises Extreme 60 rear axle with stock Jeep JKU bolt in brackets and powder coat
We also ordered our front axle from Currie. This was a bare exterior with no brackets or powder coat. This axle would be getting the Elite Suspension axle side brackets, GenRight High Steer arms, tie rod, and drag link. Stuffed with 5:38 gears and an Auburn Electric Locker and JK brakes.
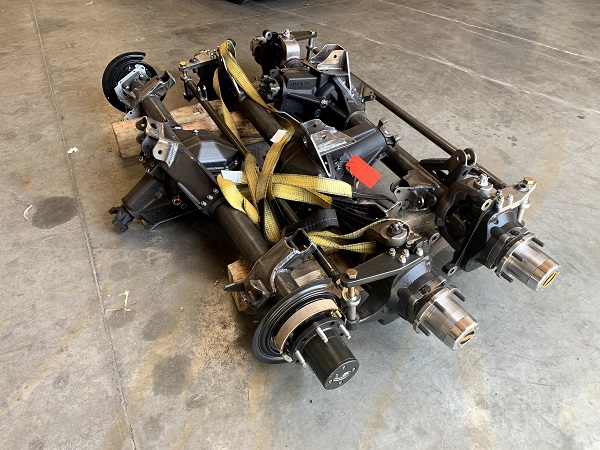
Currie Enterprises Extreme 60 front axle to the right. Shown with all brackets and steering components complete.
Its time to tear her apart and remove all of the unwanted parts. Wheels, tires, axles, shocks, springs track bars and sway bar were all removed and loaded on the customers trailer.

Jeep JKU on the lift ready for disassembly.
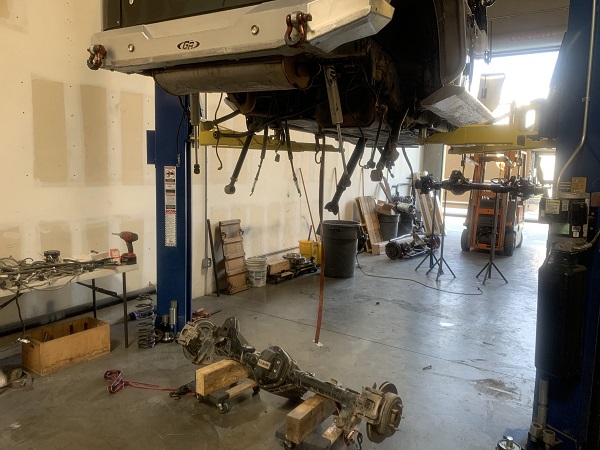
Axles removed.
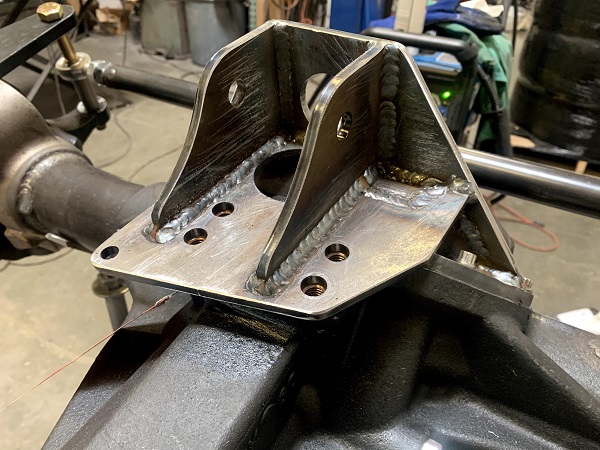
Part of the GenRight Elite Suspension is a new frame side and axle side track bar mount. These components are much stronger than stock and set the length and angle of the track bar perfect for zero bump steer. The new heavy duty track bar is included with the kit. You will need to cut the stock frame side track bar bracket off and grind the frame smooth. Next, just tack the new bracket in place, finish weld and paint. The new track bar comes with a greasable Johnny Joint welded to the frame end and a weld in bung and heim for the axle end. The bung is plug welded as well as welded at the joint.
 GenRight frame side track bar mount
 GenRight heavy duty track bar

Track Bar heim bung welded and plug welded. We drilled 4-3/8" holes in the tube for the plugs.
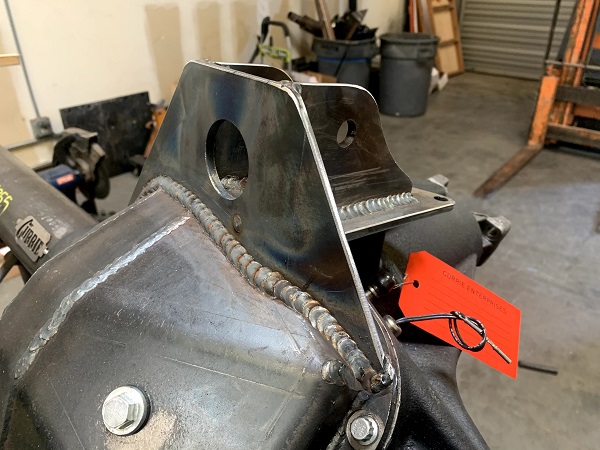
The front axle brackets are welded in place, as per the Elite Suspension instructions, insuring that they will be in the perfect position when its time to complete stage three of this build.
Passenger side link, limit strap, shock and track bar mounts complete.
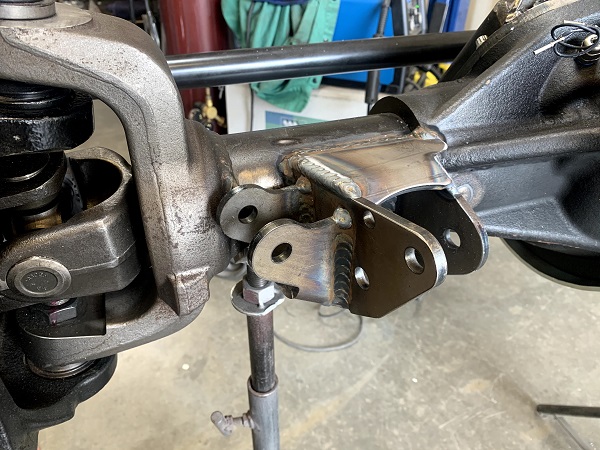
Drivers side link, shock and limit strap mounts welded and ready to paint.
This mount is designed to bolt to the Currie Extreme 60 front axle.
The upper link mount welds to the Currie heavy duty rolled back diff cover.
The Elite kit requires the installation of GenRight's High Steer kit. The kit includes a tie rod, drag link, heims, bungs, jamb nuts, hardware and passenger side high steer arm. This kit requires welding the bungs to the tubes. We plugged welded these also.
GenRight High Steer kit installed.

Hydraulic assist brackets welded to diff cover.
Hydraulic assist brackets welded to tie rod.
So far we have been only installing Elite brackets on the front axle, but now we need to make these brackets work with the shocks and coil springs that are on the Jeep. The axle will be moved forward to the exact location, as the Elite kit and the coils will stay vertical by moving them to the rear of the axle centerline. We machined the lower coil mounts from aluminum and bolted them to the Elite bump stop pads. Delrin bump stops will be bolted in the center of the coils. We added a tab next to the Elite coil over mount to move the Fox shocks back far enough to clear the coil springs.
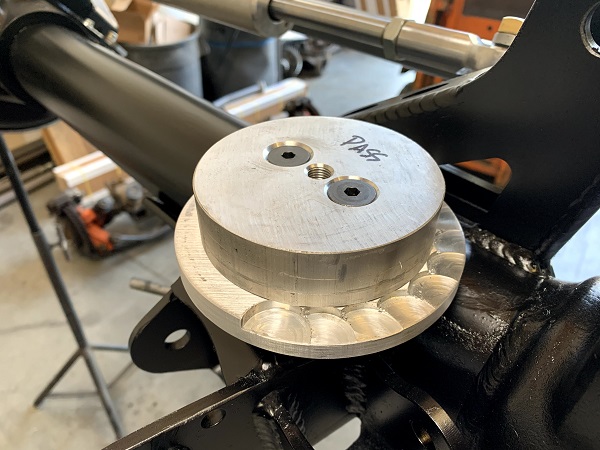
Aluminum coil spring mount bolted to the Elite bump stop pad. A Delrin bump stop will be added to the center of the coil.
Below you can see that the rear axle is installed. After cycling the rear suspension, we discovered the need to build a custom track bar to clear the diff cover and exhaust. We also relocated the bump pads and added a GenRight rear sway bar. We added limit straps and made sure the brake lines were not going to be stressed during articulation. We trimmed the GenRight Aluminum Bumpers and Aluminum fenders to optimize the depth of bump. The Fox shocks attach to the Currie adjustable shock mounts that come with the rear differential.
Setting up a suspension system like this is a lot more work than setting up an Elite Suspension. With the Elite there is no need to cycle anything. Its all been done in CAD, and proven over and over again, after hundreds of kits have been installed to date. When you change something about the kit like we did here, you will spend numerous hours cycling the suspension making sure all of the components clear the frame, fenders, drivelines, shocks, limit straps, springs, steering, bumpers, etc. It's a lot of work and you really need to pay attention to the details. A trained eye is a plus!
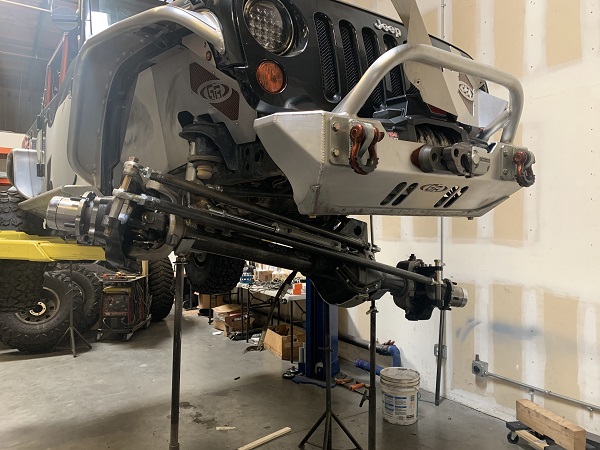
Front Currie axle flex test
After the rear was complete, we installed the front and completed the same process of cycling and testing of all components. Once we hit the optimum setup, we machined a set of bump stops from round Delrin and bolted them in place. One more cycle and the tires went on for good. The customers goal was to get the Jeep on a 40" tire. Larger tires put more stress on all of the components involved in the suspension and drivetrain. We felt the Jeep could handle the 40's so we installed a set of Mickey Thompson Baja Boss tires on a set of Raceline bead lock wheels.
Even with all of the upgrades completed to date, this Jeep still has some weak components. The stock frame side suspension brackets are thin and weak, and will not stand up to the punishment that a full Elite Suspension will handle. The Elite offers a flat belly protected with a
3/8" aluminum skid plate. The Elite moves the gas tank to the rear of the Jeep which gives it a more balanced wheeling and road experience as well as raising the belly 3". It will still be a short arm design so it will not have as much suspension travel as an Elite. The anti-squat and anti-dive is not optimized, and it will still be depending on the stock style springs and shocks and their mounts. All of this is to say that this Jeep is much tougher than when it rolled into our shop, but still not nearly as tough as a full Elite kit and will have to be driven accordingly.
About a week after it rolled in, we drove her out the door and did some final testing before calling the customer for pickup.
Everything checks out and the customer is called for pickup. The Jeep heads out for the trails.
Stage 2 of the series will consist of installing the following GenRight Items:
The only question now is will stage 2 be initiated by the customer or by the failure of one of the remaining weak links in the Jeep. We will see! Keep an eye out for stage 2 and 3 coming soon.